


Below you will find the information regarding how to setup the additional IP's you have purchased
Windows Server 2008-2012
The first thing you will need to do is to login to your server as an administrator, then carry out the following steps;
- Navigate to the Start menu and click Control Panel
- Go to "Network and Internet"
- Then "Network and Sharing Center"
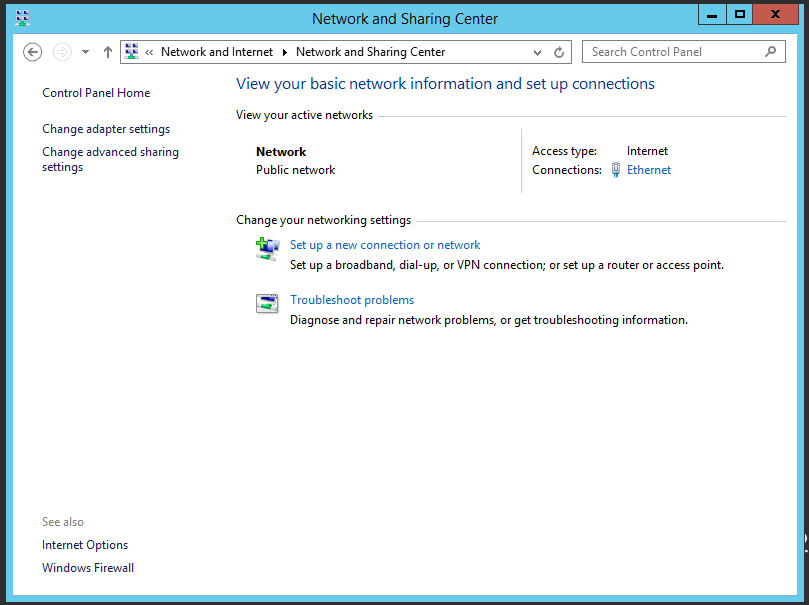
- From here you will want to select your network adapter (generally called 'Ethernet')
- Next click Properties
- Now navigate down to 'Internet Protocol Version 4 (TCP/IPv4)' and select it
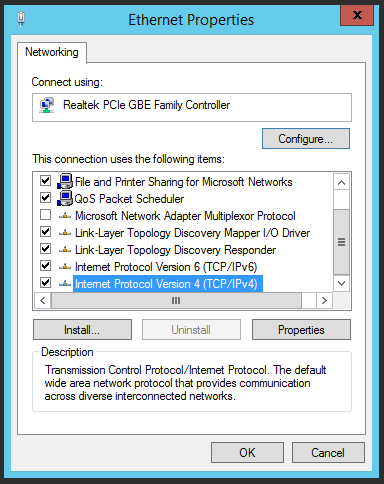
- Select Properties and then select Advanced
- Now simply select Add under your 'IP Addresses' and enter your new address as well as it's subnet mask (Leave this the same)
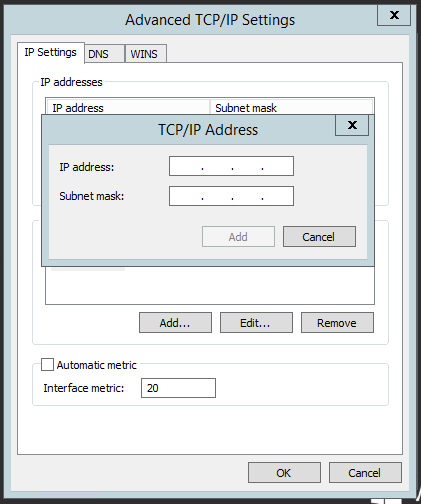
- Once saved open up a Command Prompt window and enter the following command to confirm it has worked;
ipconfig /all
Debian / Ubuntu
Updating your Debian/Ubuntu IP's can be done either via command line or manually if you are using a desktop environment, this guide will show you how to do this via command line
- The first thing we will need to do is to backup our current network configuration in-case we make any mistakes, to do this run the following command
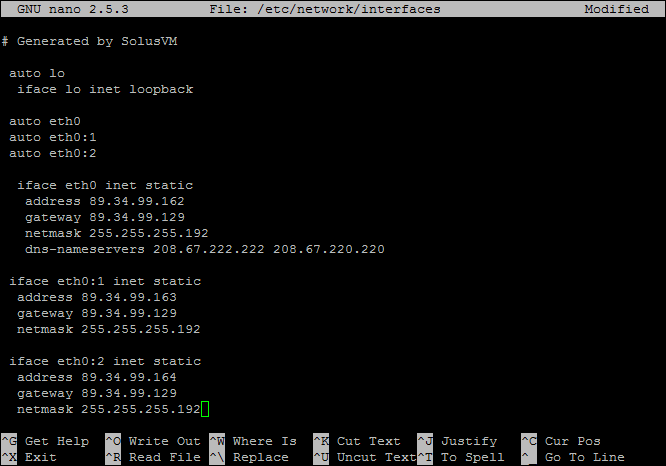
sudo cp /etc/network/interfaces /etc/network/backup Next we will want to begin editing the interfaces file, to do this run the following;sudo nano /etc/network/interfacesYou can use the command line editor of your choice to edit this file- You will now be greeted with the following information;
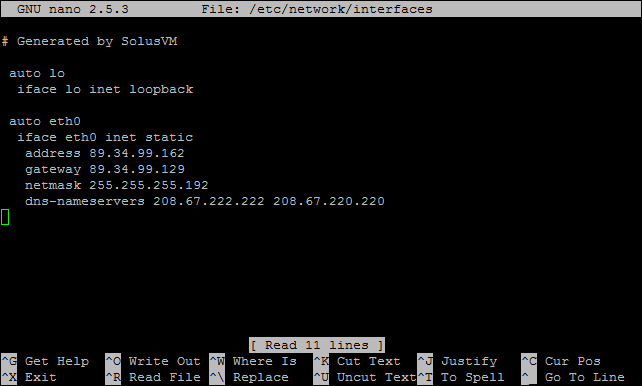
- This is where you will add the additional IP's, following the same format as the current address
- Leave the gateway and netmask the same unless specified otherwise
- Finally run the following command to enable the changes if you are running Ubuntu 12.04 or earlier
/etc/init.d/networking restartOtherwise, if you are running any newer versions run the following command. Replace X with the adapter that you wish to reset;ifconfig ethX down && ifconfig ethX up
- The first thing we will need to do is to backup our current network configuration in-case we make any mistakes, to do this run the following command
CentOS
Updating CentOS works very similarly to updating Ubuntu, however a few of the steps do differ. This information is useful if you only have a few IP's to add, not an entire range.
- The first thing we will need to do is to backup our current network configuration in-case we make any mistakes, to do this run the following command;
cp /etc/sysconfig/network-scripts/ifcfg-eth0 /etc/sysconfig/network-scripts/ifcfg-eth0-backup - Next we will want to copy our current config for eth0 and create our new config
cp ifcfg-eth0 ifcfg-eth0:0You can add as many addresses as you wish here by incrementing eth0:0 by 1 (eth0:1, eth0:2) - You will now want to edit your newly created configs by running the following command
nano ifcfg-eth0:0 - Now edit the IP address to your additional IP. Do not change any other settings unless specified otherwise.
- Once complete save the file and run the following command;
etc/init.d/network restartIf all of the steps have been followed correctly then your server should now be able to use the additional IP address you have assigned.
- The first thing we will need to do is to backup our current network configuration in-case we make any mistakes, to do this run the following command;
